


HOW TO.....
Beginners Guide to Color Balance
Using the Curves Tool
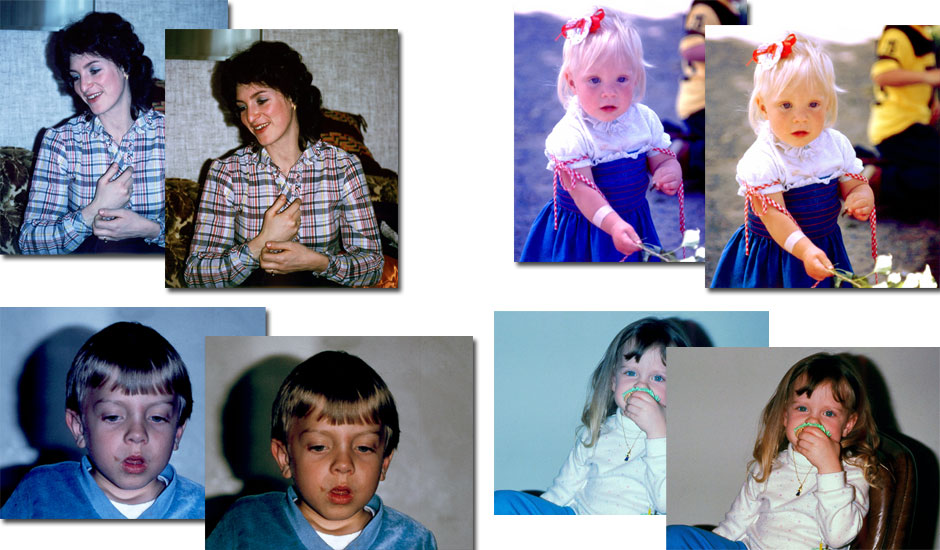
Have you ever looked at a photo and thought, "That looks a little blue..." Thankfully with digital photo editing, when your digital photos colors are not balanced you can quickly and easily fix it.
I am using Pixlr, which is a free photo editing software.
Color Balance using curves- Step 1
If you have old film and it has been scanned and converted to digital you might be wondering why the color doesn't seem balanced. There are two reason, first, the dyes in film fade over time, so if the film itself had already faded, the only way to fix it is digitally. Second, some films scan better than other types, so some films will need to be balanced after they have been scanned. If you have a newly taken digital photo and the colors are not balanced, you can easily fix all this using the curves tool in Pixlr.
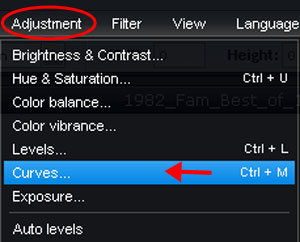
Go to the toolbar across the top in Pixlr and select "Adjustment" and a drop down menu will appear, go down to "Curves"
Color Balance using curves- Step 2
At first curves can feel intimidating, but don't fret, it's extremely easy and the results are dramatic.
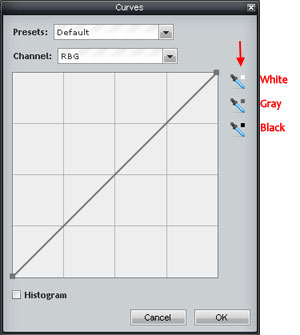
If you look the right side there are three droppers, the top is white, the middle is gray and the bottom is black. What you need to do is select a dropper based off the color and then you need to take your cursor (which will now look like a dropper) and select a part of the picture that is supposed to the color you selected. For example, if you have a silver watch in the photo, select the middle gray dropper and click on the watch. The color will automatically adjust the entire photo. If you don't like the effect, just click in a different spot until you get the right balance.
Now, this can be done with either white, black or gray. However, in my experience, I don't have the best success using black and white, but I have great success with the gray dropper. So I would suggest starting with the gray dropper and see where you get.
Color Balance using curves- Step 3
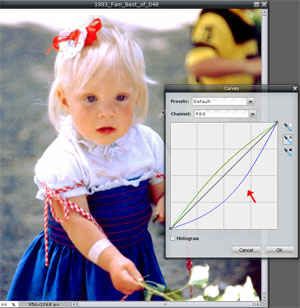
Once you click on a spot in your picture, you will notice that the lines in the box will have adjusted according to the changes it just made. Once you really get the hang of curves, you can use your mouse to grab the gray line and move it up or down. If you move the line up/left it will lighten the photo, if you move the line down/right it will darken the photo. I don't necessarily recommend doing this, but I wanted to let you know it's an option. I personally recommend using your dropper until you get the right balance.
Color Balance using curves- Step 4
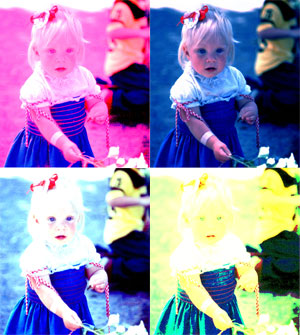
Now, while you are clicking around getting the right balance don't panic if your photo goes from a bit discolored to outright crazy. It happens, just click on a different spot and it will adjust itself again.

Color Balance using curves- Step 5
Here is my finished product. It was super simple and it looks day & night better.
Check Out Our Great Tutorials on Digital Images, Videos & More
Editing & Color Correction |
|
Fun & Quirky Tutorials |
|
Emailing, Cropping, Unzipping & Downloading Files |
|
Do It Your Self Guides |
|
| |
Protecting & Storing Digital Files |
|
| |
Digital Cameras |
|
| |
