


HOW TO.....
Beginners Guide to Removing Wrinkles & Other Blemishes
The first time I saw that I had forehead wrinkles I saw it in a photo. I was shocked, horrified & immediately depressed. I was 28 and I had wrinkles! I just kept thinking, "When did this happen????" I immediately started to scour through my digital images to see when my wrinkles made their first appearance, and sure enough... they appeared immediately after giving birth to my first son. So I blame him. There isn't a lot that can be done about it, but thankfully I can erase the existence digitally. I learned how to photoshop out my forehead wrinkles, but it was kind of a pain, and I was looking for something a little easier. That is when I discovered PicMonkey, and I have been in love with it ever since. PicMonkey takes all the complicated parts of photoshop and simplifies it with simple easy tools to erase wrinkles, whiten teeth, reduce shine, brighten eyes...etc. It's perfect for fixing up some past images that could use a little alteration, and even better to post online to show off your new look and brag to all your high school friends about how great you still look.
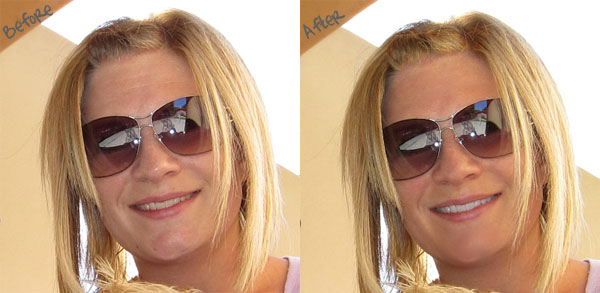
I spent about ~10 minutes fixing up this picture. I minimized the wrinkles across my forehead, whitened my teeth, reduced the shine on my face (it was 90 degrees outside!), I fixed up some blemishes on my chin, added a bit of tan to my face and touched up my roots a bit. I had "quite a bit of work done", but it was fast, painless & it still looks natural.
Some digital corrections can be done using PicMonkey for free, but if you want to use their "royal" features you will need to sign up for their paid service which is only $5 per month. I am a photoshop fan, but I LOVE how quick & simple their software is.
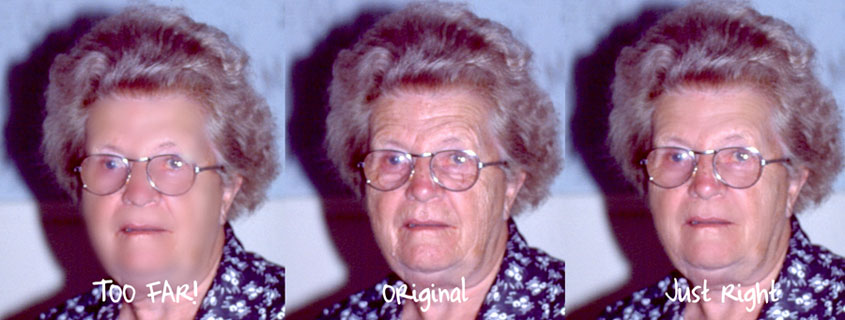
Below are some other examples of images that I quickly fixed up using PicMonkey. Some look nice & natural, but I included one example of where I went too far.
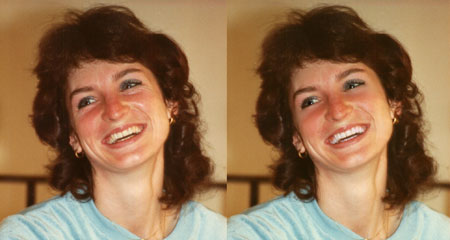
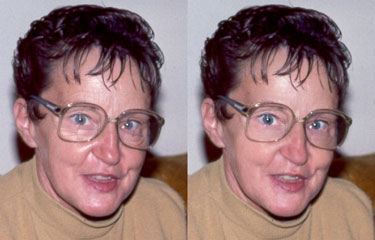
As you can see, you can go a little overboard with the digital corrections.
You can easily shave off 20+ years, but if you try & erase 40+ years you will be disappointed.
Wrinkle Removal
Once you get to PicMonkey click on the button that says "Edit Photo", and then you will want to click on the button that says "Open" so you can select your photo.
Along the left side column there will be some icons which will open up the different types of corrections you want to make. You will want to click on the lipstick icon for all the cosmetic digital corrections.
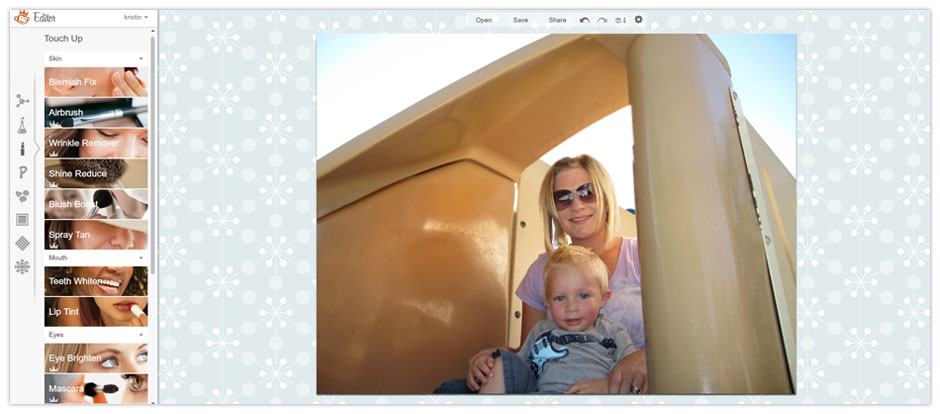
Once you click on the lipstick icon, you will see all your different corrections available.
Click on the Wrinkle Remover box.
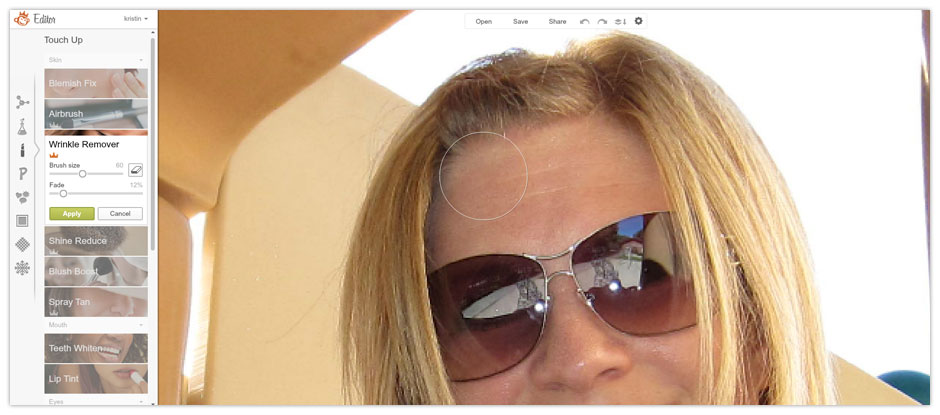
A drop down window will appear giving you some options.
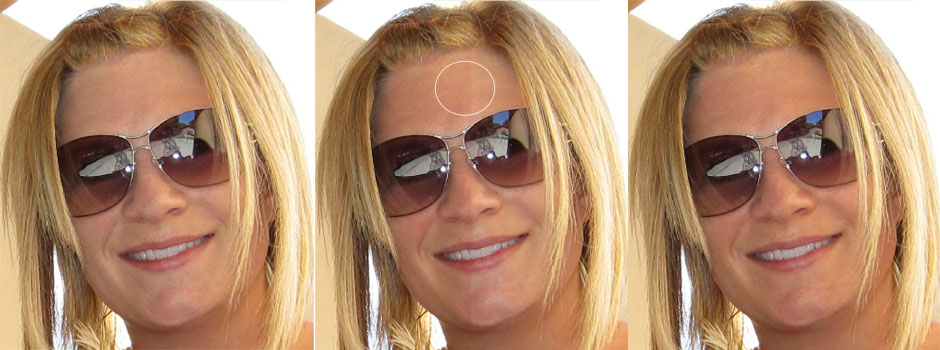
Brush:The size of your brush matters! The bigger your brush, the broader your changes will be, the smaller your brush, the more detailed your changes will be. As you can see by the giant circle on my forehead, the brush is way too big and I will need to use the slider to make my brush size smaller.
Fade: The fade setting determines how strong your digital corrections will be. It seems a bit counter-intuitive, but the lower the % that you set your fade, the stronger your wrinkle removal will be. If you drag all the way to the left, your fade setting will go to zero and your wrinkle removal will become very strong. If you slide the ball all the way to the right your changes won't be noticeable.
Play around until you feel you have found a good brush size for your wrinkles & a good fade setting.
Something to be aware of... When you move your fade setting back & forth it will affect changes you have already made with the wrinkle remover. So you can't crank it up to remove a big wrinkle & then lower it to remove a smaller wrinkle. If you want to be able to do that, click the green apply button, and then open the wrinkle remover again. This will keep your wrinkle corrections independent from each other.
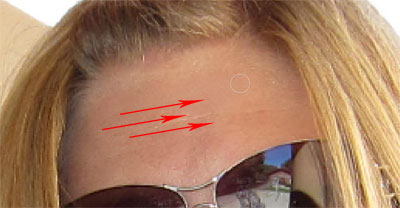
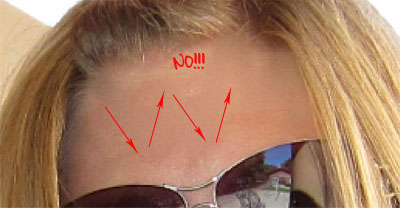
To remove your wrinkles you will want to move in the same direction of the wrinkle. Since my wrinkles go across my forehead, I will move the brush from left to right in a sweeping motion. This will give you a natural look. If you move up & down across the forehead your corrections won't look natural.
Wrinkle Removal Complete!
As you can see, the wrinkles have been removed from my forehead, but the effects look natural and there are no pixilated remnants of my corrections.
When you are done making your wrinkle corrections, you will want to hit the Green Apply button.
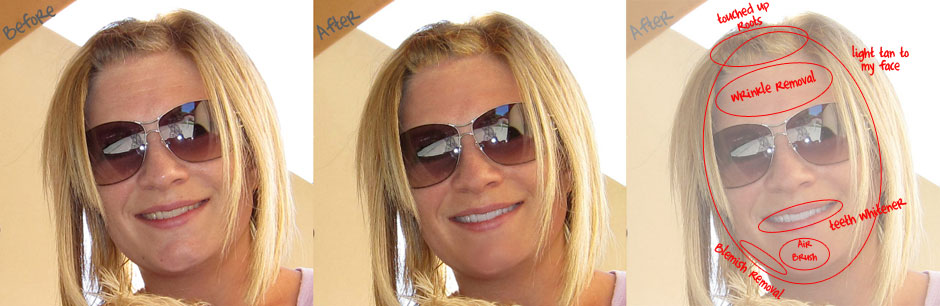
As you can see, I didn't stop at just touching up some wrinkles. I will quickly cover the different corrections that I applied.
Teeth Whitener
I love this feature! I know how to whiten teeth in photoshop, but it takes a lot longer than with PicMonkey, and requires too many steps. You will want to pick your brush size, try & get a size that is just a little smaller than the size of the tooth. Slowly work your brush over the teeth, making sure you don't hit your lips. When you are done, hit the green apply button.

Blemish Removal
I have some moles on my jawline, my mom calls them "beauty marks," but they are just little moles. To remove blemishes such as moles, pimples or imperfections in your skin, you will pick your brush size & hover over the blemish & click your mouse. The blemish will magically disappear! Make sure your brush is the approximate size of your blemish, you don't want it to be too large.

Root Touch up or Highlights
I will let you in on a little secret...I'm not a natural blonde...
Keeping up with blonde roots is tough, and I usually have a little regrowth that sprouts up about 2 weeks after I color my hair. It is really easy to digitally touch up roots. First, when you click on the box that says "Highlights" you will see little mannequin heads with different color hair. You will want to pick your general hair color and then use the color palette to adjust the color to match your desired tone. I kept my brush pretty small so that I would only get my roots & not turn my blonde hair orange.

Spray Tan
To add a spray tan, you need to pick your general skin color, and play around with the intensity & darken settings. I just added a bit of a glow to my skin to hide my hot blotchy complexion in this photo (did I mention it was 90 degrees?!).
Air Brush
My chin is always pretty blotchy and it needed a bit of smoothing out which the airbrush tool did easily. Just pick your size brush and slowly work over the area.

I hope you enjoyed my quick tutorial on using PicMonkey to digitally erase wrinkles and fix other facial blemishes.
Check Out Our Great Tutorials on Digital Images, Videos & More
Editing & Color Correction |
|
Fun & Quirky Tutorials |
|
Emailing, Cropping, Unzipping & Downloading Files |
|
Do It Your Self Guides |
|
| |
Protecting & Storing Digital Files |
|
| |
Digital Cameras |
|
| |
